Customize QuickBooks Forms for a More Professional Image
Posted on October 20, 2015 byWant an easy, free way to make your business look more professional and polished? Customize your forms. QuickBooks has the tools.
As a Real Estate Investor you may be asking yourself “Why do I need to do this? I don’t send out invoices or statements” – You may, on a very rare occasion, need to do just that for a late paying tenant or invoice them for repairs that they are responsible for. Or you may need to provide financial documents from QuickBooks to a lender/investor.
You probably don’t get as many paper forms in the U.S. Mail as you used to. But when you do, do you draw conclusions about the business that sent them based on what their forms look like?
Whether or not you think you do, most people make judgements on businesses based on collateral materials. You might notice that there’s no company logo, or that there are unnecessary blank fields. Maybe the print is very light or blurry, and there’s no message at the bottom thanking you for your business and your payment.
How you present yourself on paper does matter. There’s a lot of competition out there, and you need to use all of the tools available to you to stand out. QuickBooks provides one way to do so with its simple forms customization features.
Getting Started To see what forms are available for customization, open the Lists menu and select Templates to open this window:
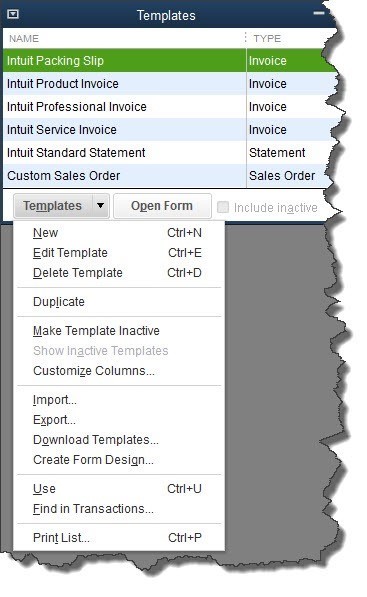
Figure 1: QuickBooks’ Templates window shows you what forms can be customized and provides tools for working with them.
Before you try your hand at customizing a form, make a copy to work with first. Highlight Intuit Service Invoice. Click the down arrow next to Templates in the lower left, and select Duplicate. A small window will open, displaying your options. Select Invoice and click OK.
QuickBooks will then take you back to the Templates window, and you’ll see a new entry labeled Copy of: Intuit Service Invoice. Right-click on it and select Edit Template from the menu that opens. This will open the Basic Customization window.
There are two parts to this screen. The editing options for the template you selected will appear on the left, and a preview of your invoice will display on the right. As you make modifications to the template, the preview will change to reflect them.
The best, most noticeable thing you can do to customize your invoice is to add a logo. Click the box in front of Use logo, and locate the file in the computer directory that opens. Double-click it. You logo will appear to the left of your company name and address in the upper left corner of the preview.
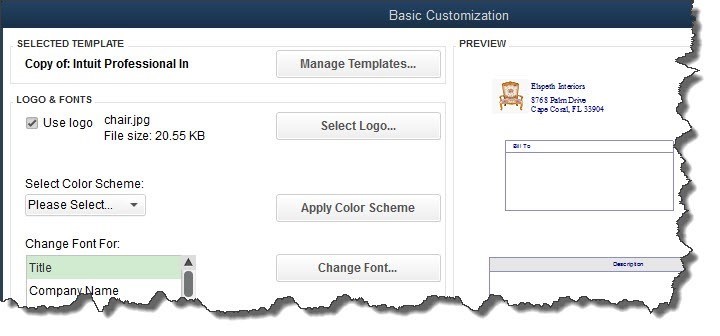
Figure 2: The Basic Customization window displays options for modifying your copy of the Intuit Service Invoice template.
You can make numerous changes to your template in this window, like:
- Selecting a new color scheme,
- Changing fonts,
- Deciding how much of your contact information should appear, and Indicating whether the Print Status Stamp (PAID, PENDING, etc.) should appear where appropriate on your invoices.
Note: You can choose to use the same modified design on multiple types of forms. This is a little complicated; if you feel that it gets confusing, please let us help you.
More Customizing Options
The changes you just made were fairly superficial. However, QuickBooks offers tools that let you go much further, modifying the actual content of the invoice itself, its columns, and its fields. To get started on this, click the Additional Customization button at the bottom of the screen. The window that opens displays a preview of your invoice on the right side, just like in the previous window.
Your customization options appear on the left side, divided into five different sections. You’ll work primarily with three of them for your invoice:
Header. This includes all of the information that appears on about the top third of the form, like Bill To, Terms, Due Date, and Project/Job.
Columns. What are you billing the tenant for? Item, Description, Quantity, Rate, etc.
Footer. What information will you want to enter after you’ve completed the invoice’s Service or service content? You’ll likely want fields like Total, Balance Due, and Payments/Credits, perhaps a Message.
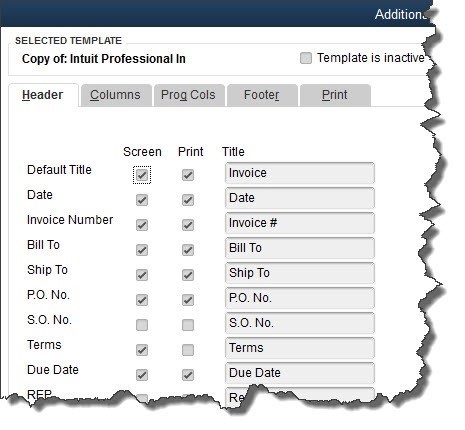
Figure 3: QuickBooks gives you tremendous control over the content in your forms.
As you can see in the above image, QuickBooks lets you choose whether specific fields and columns will appear on your invoices onscreen and/or in print. You can also change field labels if you’d like. And if you have overlapping fields or want to further modify the appearance of the invoice, you can use the Layout Designer. It’s a simple tool, but it requires some design skills.
Of course, you may not be printing many invoices at all if you’re set up to email them and accept payments online. But your tenants, of course, will still see how carefully you’ve crafted your forms, which will feed into their overall perception of you. Let this impression be a good one.
 Karen Bershad is The Small Business Advisor. Most small business owners have a challenge handling all the different areas of running a business. The accounting can be a challenge, particularly if the software seems overwhelming. The Small Business Advisor is what you may need to get you to the next level of your business. We work at your office or provide off site assistance in getting things under control by providing a wide variety of services that are specifically for the small business.